Create an NFT

Here we guide you through 8 general steps for you to be able to create an NFT on the blockchain Ethereum.

How to create NFT

Create an NFT on Ethereum

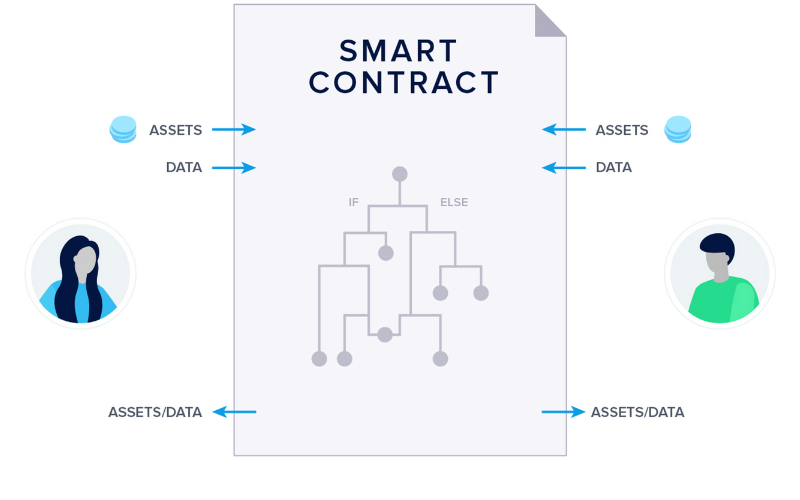
An NFT consists of a digital file, identification code, metadata, ownership and transaction history. Creating images, songs, videos or other digital files is the creation from the artistic perspective of NFTs. However, from the blockchain perspective, the creation of an NFT is about so-called minting. Minting is the process when the digital file and metadata are uploaded to the blockchain and converted into an NFT.

Step 1 - Create a digital file

Create the digital file (image, song, video, etc.) that you want to create an NFT out of.

To create an NFT, you first need to create a digital file, digital media

Step 2 - Connect to Manifold

Create NFTs with Manifold where you use MetaMask wallet

Step 3 - Create a smart contract

  • Click 'New contract'. You will then be directed to fill in details of the smart contract (token type, name, contract symbol and ASCII art).
  • ERC-721 tokens are used if you intend to create a single NFT while ERC-1155 tokens are used if you intend to create multiple editions.
Create a smart contract on Manifold where you fill in contract details including type of token

Step 4 - Test on Goerli

  • Click 'Deploy on Goerli' to connect your MetaMask wallet to Ethereum's test network Goerli where you can ensure everything is working and also test minting a token (the actual creation of an NFT as it is uploaded to the blockchain).
  • If you don't have any Goerli Test ETH you need to go to goerlifaucet.com and create an Alchemy account.
  •  Then paste your wallet address in the text field ('Enter Your Wallet Address') on the goerlifaucet and press 'Send Me ETH' - you will then receive 0.2 Goerli Test ETH in your wallet.
  • Go back to Manifold and press 'Deploy on Goerli' to create your test smart contract.
Post the smart contract on Ethereum's test network Goeli and create a token to represent your NFT

Step 5 - Deploy smart contract

  • If everything works on the Goerli test network, you can click 'Go to dashboard'.
  • Then you can deploy your smart contract on the Ethereum mainnet network by clicking 'Deploy to Mainnet'. Note that nothing in your smart contract can be adjusted after this.
  • In this step, a fee is paid in ETH.
Post the smart contract on the Ethereum main network

Step 6 - Mint your NFT

  • Mint the digital file on your smart contract by clicking 'Mint a token on Mainnet'.
  • In this step, a fee is paid in ETH.
Creating or minting an NFT on the Ethereum mainnet is done by converting the digital file into an NFT

Step 7 - Set royalties

  • Set up royalties %, the share of the sale price on the secondary market that should accrue to you as the creator. 0-10% is common.
  • In this step, a fee is paid in ETH.
Set royalties for NFTs to determine the percentage of the sale price the creator will receive on the secondary market

Step 8 - Review your NFT

  • Finally, you can go to different NFT marketplaces to review your NFT(s) and double check the royalty settings.
  • Congratulations, you have now created an NFT the world can enjoy!
Check your royalty settings on various NFT marketplaces

Don't fall behind

Discover the opportunities in the NFT space today. Sign up below. Newsletter incoming.