
Ledger's security combined with MetaMask's ease of use
In this crypto wallet guide, we go through how to set up a MetaMask wallet, set up a Ledger hardware wallet, and connect Ledger to MetaMask. This setup gives you via MetaMask access to all decentralized applications on Ethereum, such as NFT marketplaces, while the connection with Ledger provides an extra layer of security for your NFTs and cryptocurrencies.
What is MetaMask?
MetaMask is the most popular crypto wallet on the blockchain Ethereum which allows you to manage NFTs and cryptocurrencies on the blockchain. Unlike a bank or a centralized wallet, MetaMask does not control your assets or your transactions. As long as you keep your wallet safe and only you have control of your private keys you are the one in full control of your assets. MetaMask also provides an interface that is connected to the Internet to enable functions on websites. Being connected to the internet makes it more vulnerable to hacker attacks, compared to a hardware wallet like Ledger.
What is Ledger?
A Ledger hardware wallet, combined with the Ledger Live app, is one of the best options for keeping your NFTs and crypto safe. The hardware wallet keeps your private key protected at all times, in a certified chip. No one can access the private keys except you. All transactions must be verified on the device's display and physically be confirmed by you as the owner. Even if you transact with the hardware wallet, the wallet confirms the transactions in an offline environment. This set up keeps your private keys away from the risks of being connected to the internet, at all times.
———————————————————————
———————————————————————
Guide to get started with your MetaMask wallet
Step 1: Download MetaMask
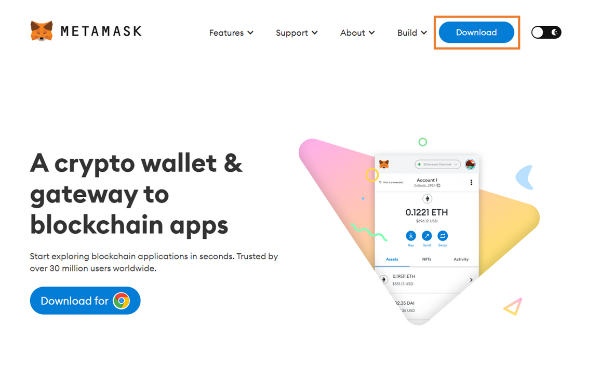
Start by heading to MetaMask.io and click 'Download'.
MetaMask is compatible with Chrome, Firefox, Brave and Edge browsers where Chrome or Firefox is recommended. In this guide we use Chrome.
Step 2: Install MetaMask

Click 'Install MetaMask for Chrome' which will take you to MetaMask's Chrome application page. Make sure you are on the official website by checking the verification symbol of the application, the number of reviews and the number of downloads.
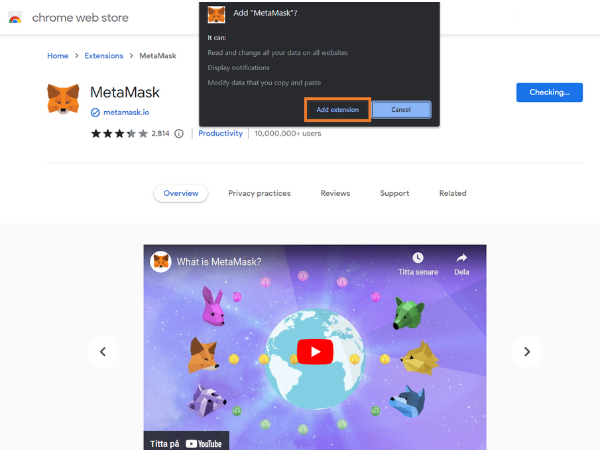
Step 3: Add MetaMask
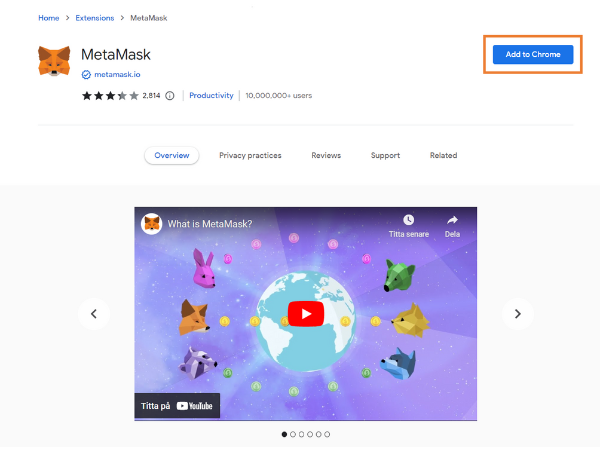
Click 'Add to Chrome' which results in a pop-up window, 'Add MetaMask', appearing. Click 'Add extension'. Then attach the MetaMask extension to your browser.
Step 4: Get started
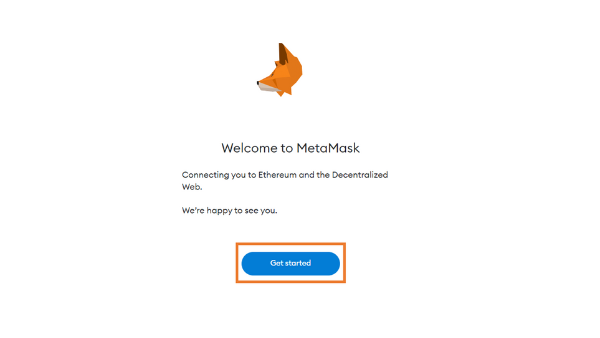
A new window opens where you click 'Get started'.
Step 5: Create a new crypto wallet
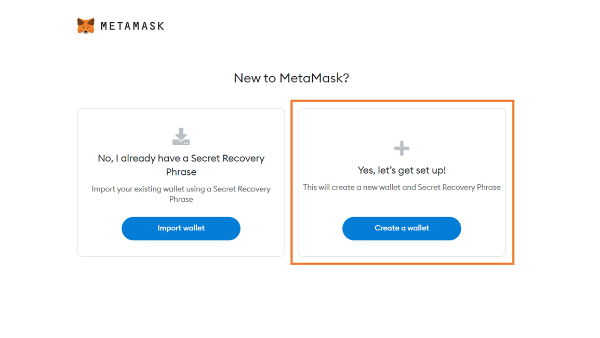
To create a new crypto wallet, click 'Yes, let's get set up!' and then 'Create new wallet'.
Step 6: Agree to collect user data or not
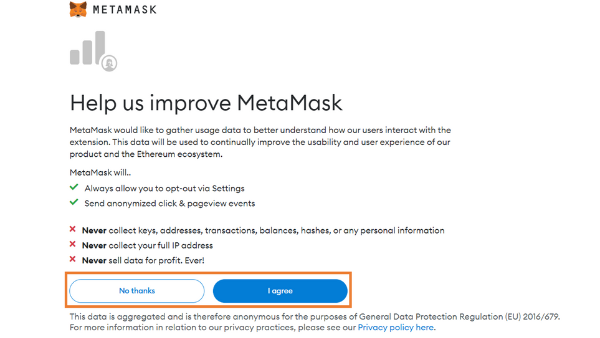
MetaMask asks if they can collect your user data. If you accept, click 'I agree'. If not, click 'No thanks'. Not accepting does not affect your ability to proceed in the installation process.
Step 7: Create a secure password
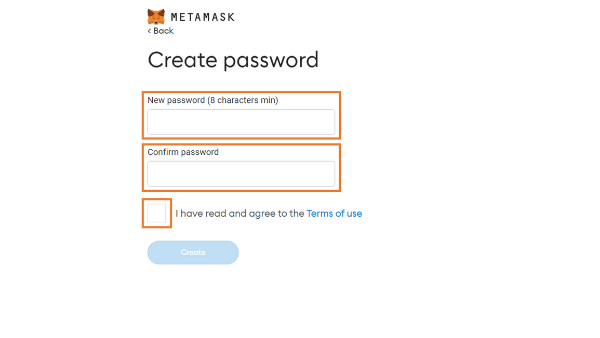
Create a long, secure password that you don't use for other accounts. Then confirm your password and agree to the terms. You will be using the password to log into your MetaMask wallet.
Step 8: Information video
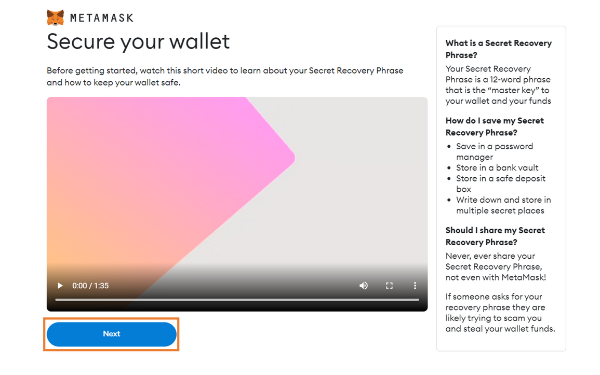
Now it's time to watch a short video explaining what a 'Secret Recovery Phrase' is, also called 'seed phrase'. You will also receive information on how to keep your crypto wallet safe. Then click 'Next'.
Step 9: Reveal your seed phrase
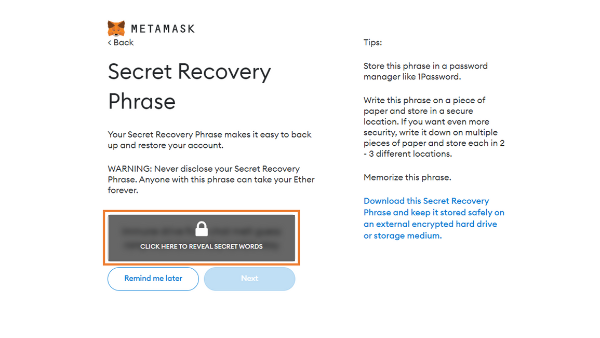
During the process of creating your crypto wallet, MetaMask assigns you a seed phrase, a recovery phrase for the wallet. A seed phrase is a series of words that rarely will be used but can be likened to the keys unlocking your crypto wallet.
Never share your seed phrase with anyone, ever! If someone gets access to your seed phrase, they can access all the assets your wallet gives you access to. Additionally, never store your seed phrase digitally! Write down your seed phrase physically, in the correct chronological order before you click 'Next'.
Step 10: Confirm your seed phrase

Confirm your seed phrase by clicking on the words in the correct chronological order before clicking 'Confirm'.
Step 11: Congratulations – you have now created a MetaMask wallet
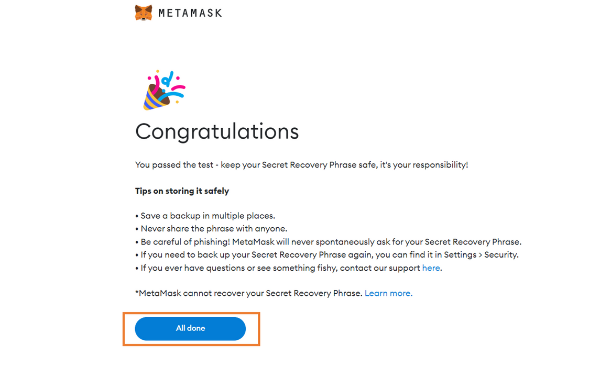
Click on 'All done'. Now that your MetaMask crypto wallet is created, you can interact with decentralized applications (dApps) such as NFT marketplaces. However, to buy an NFT you first need to buy cryptocurrency. Check out our guide to buying your first NFT here for further guidance.
———————————————————————
———————————————————————
Guide to set up your Ledger wallet
To follow the step by step guide below, you need to have purchased a hardware wallet from ledger.com/start and have downloaded and installed the Ledger Live application on your computer. Instructions for this come with the package your hardware wallet is delivered in. In this guide we use Ledger Nano X.
Step 1: Get started with your Ledger wallet
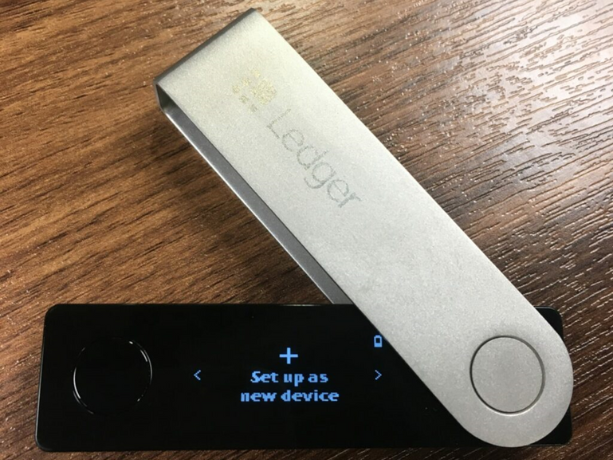
- Connect your Ledger to your computer with the USB cable. Contact Ledger if the device immediately asks for a PIN, as this may mean it is not safe to use.
- Press both buttons at the same time to turn on the device. Press left or right to navigate through the instructions on the device.
- Press both buttons at the same time to select the 'Set up as new device' option that will appear on your Ledger's screen.
Step 2: Select PIN code
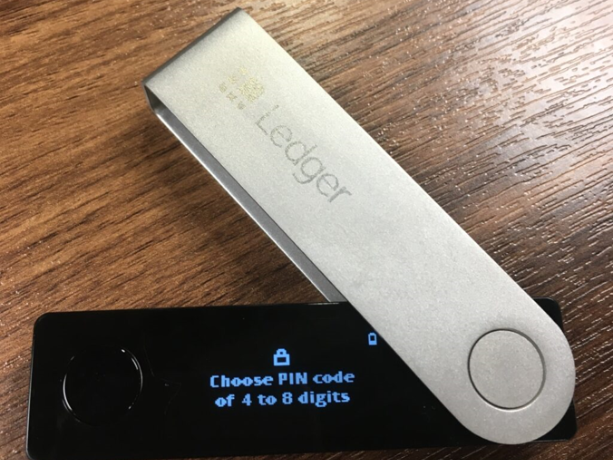
- Press both buttons at the same time when you see 'Choose PIN code' on the screen of the device.
- Navigate left and right to a number and press both buttons at the same time to select the first digit of the PIN code.
- Repeat the process until you have chosen 4 - 8 digits as your PIN code. 8 digits contribute to higher security.
- Select ✓ and confirm the PIN code by pressing both buttons at the same time.
- Verify your PIN code by re-entering the numbers.
Step 3: Write down your seed phrase
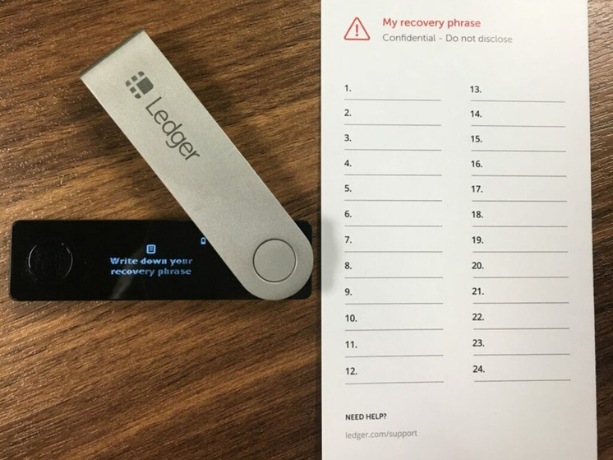
- Your 24-word recovery phrase (seed phrase) will now be displayed word by word on your Ledger's screen. The recovery phrase is the only backup of your private keys and is displayed only once.
- Write down the first word (word #1) on the recovery sheet.
- Press the button to the right to move to the second word (word #2). Write it in position 2 on the recovery sheet. Check that you have entered the correct word in the correct place on the recovery sheet. Repeat the process with the other words up to and including the twenty-fourth word (word #24).
- Press both buttons at the same time to confirm your seed phrase.
Step 4: Verify your seed phrase and complete the installation process
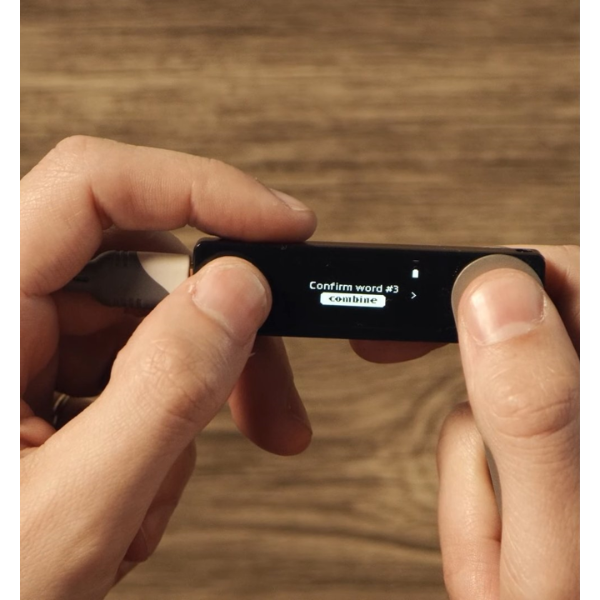
- Select the requested word that appears on the Ledger's screen by navigating with the left or right button. For example, enter word #3 if prompted on the screen. Confirm the word by pressing both buttons at the same time. Repeat the process for each word that appears on the device's screen.
- Your Ledger will now show 'Processing' and then the device is ready and you have completed the installation process.
- Press both buttons at the same time to access the dashboard of your Ledger. The 'Dashboard' on the device is where you can access your apps and settings.
Step 5: Install apps in Ledger Live
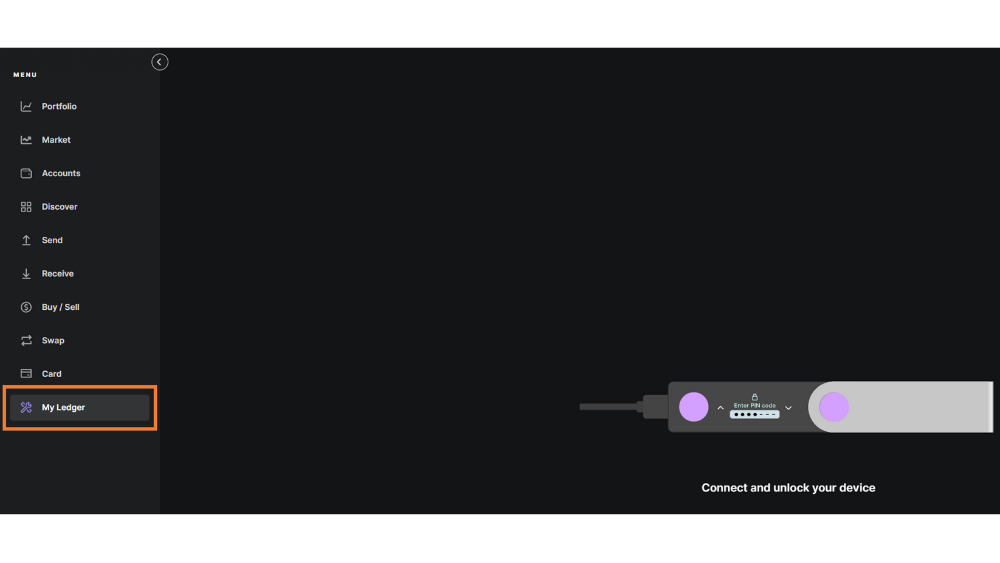
- Open the Ledger Live application and click on 'My Ledger'.
- Connect and unlock your Ledger by entering your PIN code.
- Press both buttons at the same time to select 'Allow Ledger Live' on your Ledger's screen.
- Go back to the Ledger Live application and click on 'My Ledger'.
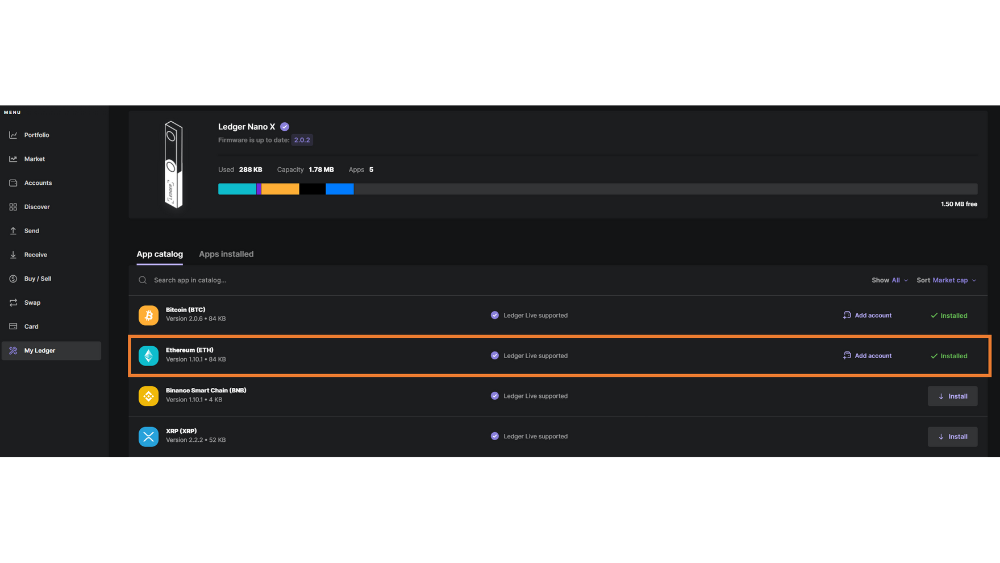
Now select the apps you want to install from the 'App catalog'. Install Ethereum at least.
Step 6: Create Ethereum account

Click on 'Add account' in the 'App catalog' to create an Ethereum account. Sweet! You now have created an Ethereum Ledger account.
———————————————————————
———————————————————————
Guide to connect Ledger with MetaMask
Now that you're up and running with your software wallet MetaMask and your hardware wallet Ledger, we walk you though how to connect them, which enables a set up with a strong layer of security (Ledger) combined with ease of use (MetaMask).
Step 1: Login to MetaMask
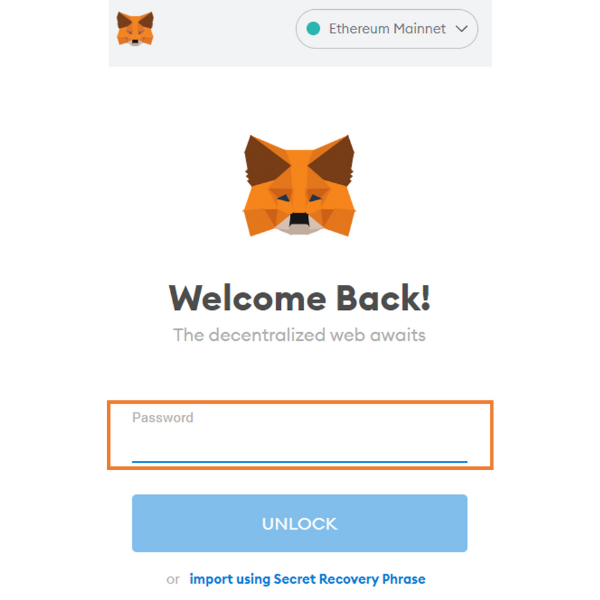
Open MetaMask and log in with your password.
Step 2: Connect hardware wallet

Click on the top right menu (circular colorful icon) in MetaMask and then click 'Connect hardware wallet' in the drop down menu.
Step 3: Start your Ledger
- Connect your Ledger to your computer.
- Enter your 4-8 digit PIN code.
- Navigate to the Ethereum application and press both buttons.
Step 4: Connect Ledger to MetaMask
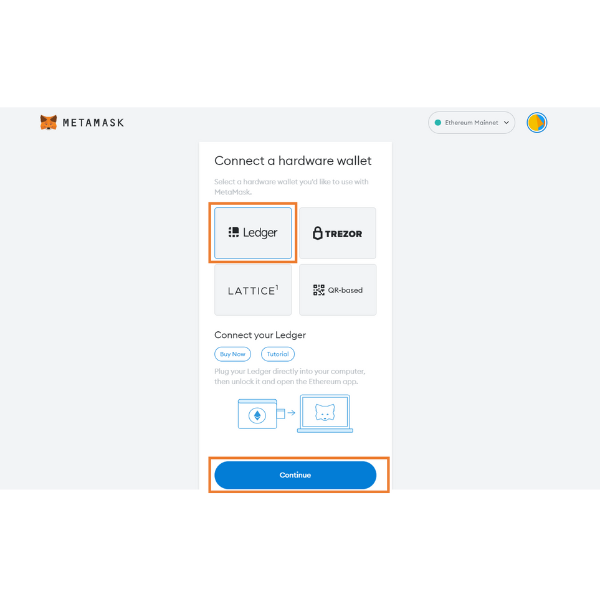
On the screen you will now see several wallet alternatives, select Ledger and click 'Continue'.
Step 5: Select your Ledger account

When your connected Ledger is detected, you will be prompted to select the Ledger account you want to connect to MetaMask. Select the account you previously created via Ledger Live and click 'Unlock'.
Step 6: Ensure functionality
- Navigate and click both buttons to select the Ethereum application on your Ledger (if needed again).
- Navigate to 'Settings' and press both buttons.
- Navigate to 'Blind signing'. Press both buttons and ensure the device goes from showing 'Blind signing NOT Enabled' to 'Blind signing Enabled'. This ensures that the device works to sign transactions.
Step 7: Update MetaMask settings

- You can now view your Ledger account via MetaMask.
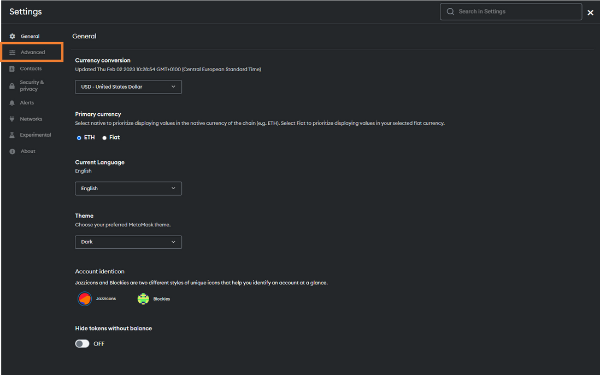
- Open MetaMask, click on the top right menu (circular colorful icon), select your Ledger account and click on 'Settings'.
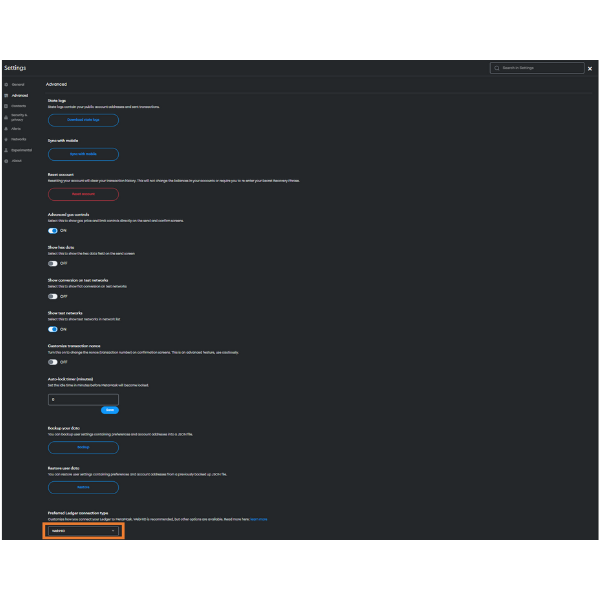
Step 8: Set up Ledger's connection to MetaMask
Click on 'Advanced settings', scroll down and select 'WebHID'. This allows you to use Ledger together with MetaMask without going through Ledger Live.
———————————————————————
———————————————————————
Voila! You can now interact with all Ethereum applications such as NFT marketplaces with the security of Ledger's hardware wallet and MetaMask's interface and ease of use.


This Post Has 2 Comments
Pingback: Guide: Best Hardware Wallet for Cryptocurrencies 2025 - Cryptogeeks
Pingback: How to buy ethereum 2025: complete guide & steps - Cryptogeeks
Comments are closed.